Log into OMS and select General Ledger Transactions from the Accounting Menu. Then click the Verify Checks tab.
The screen populates with checks that need to be printed. If a check was printed on the check register page it will not be available on this page.
Select search criteria to narrow down the
list.
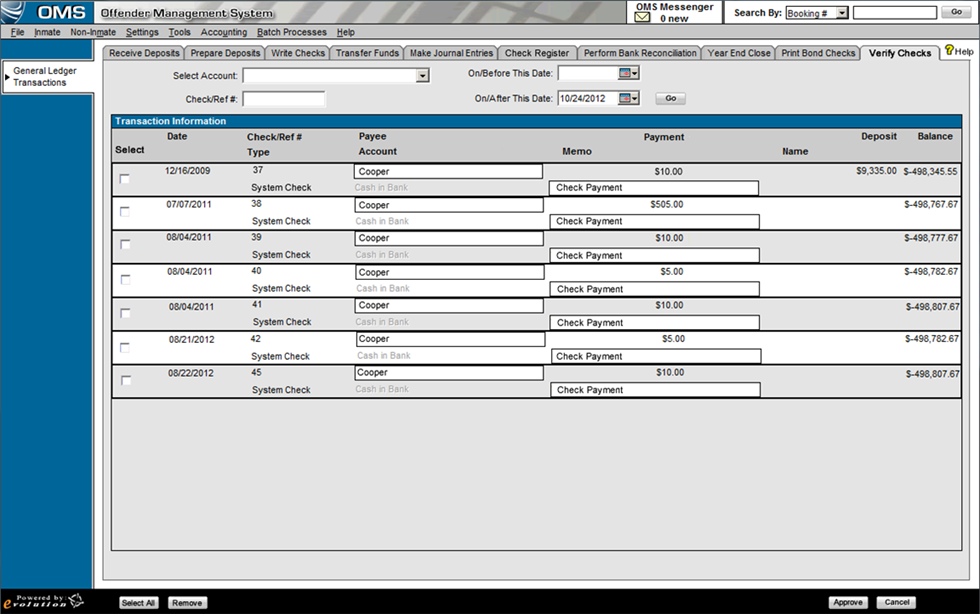
The Select Account drop down is a required field. The On/After Dates default to the current date, but may be changed if necessary.
Select the Go button to filter the results.
View the check information and approve all checks that will be sent to the printer to automatically print. Automatically printing checks should be a nightly process.
Select a check individually by selecting the checkbox.
Select all records, by selecting the Select All button.
The user will need to then select the Approve button to send the checks to the printing queue. At this time, the checks will be removed off the list. If a print job fails, the check reappears in the print queue. If checks are successfully printed, they are automatically removed from the print list.
If a print job fails, the checks will remain on the list. They can either print the checks again, or remove them from the list by selecting the Remove button. Once removed the check will remain on the Check Register page and will be flagged as not printed. Checks can be printed from the check register page if need be.